
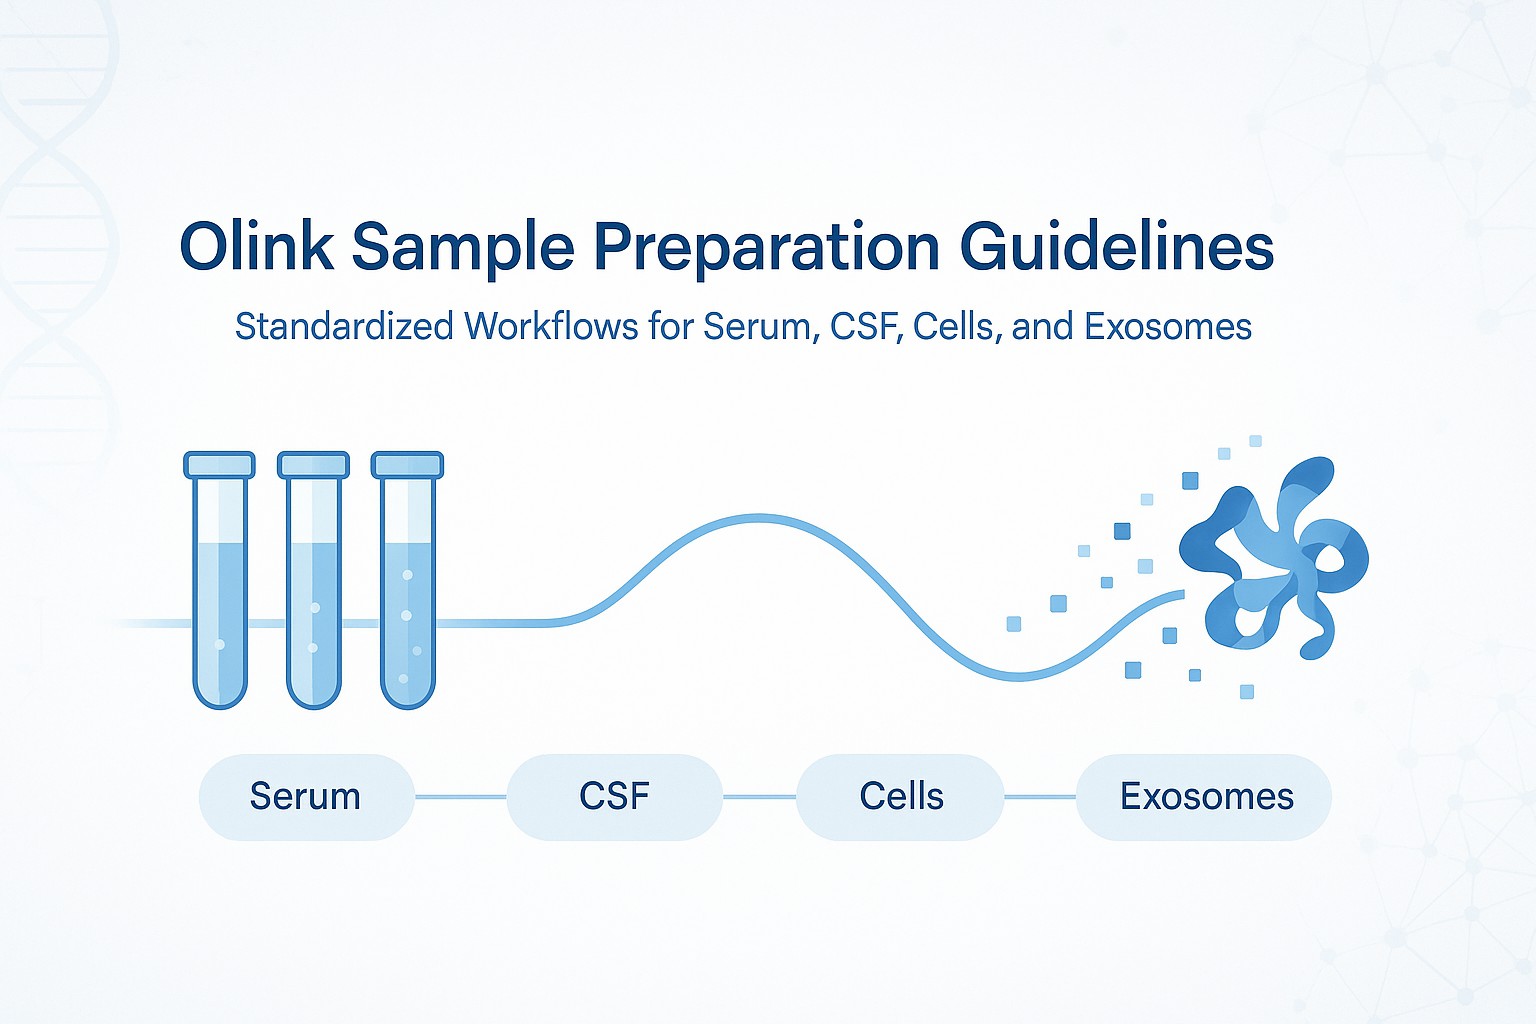
→ Expands on the range of sample types (serum, CSF, exosomes) covered in the article.
Introduction: Ensuring Reliable Results in Olink Proteomics Sample Preparation
Accurate sample preparation is the cornerstone of reliable Olink proteomics analysis. For researchers studying complex biological systems or validating protein biomarkers, even minor deviations in handling can significantly impact data quality and reproducibility.
At Creative Proteomics, we provide a unified set of sample preparation guidelines covering various research matrices, including serum and plasma, cell lysates, exosomes, and conditioned media. These best practices are optimized for Olink's Proximity Extension Assay (PEA) technology, enabling ultra-sensitive detection of low-abundance proteins across multiple biological pathways.
By standardizing every step—collection, lysis, concentration, and normalization—our protocols support high-throughput, quantitative proteomics in clinical, translational, and multi-omics research settings. Whether your goal is to map cytokine profiles, evaluate signaling pathways, or discover disease-specific biomarkers, following validated Olink sample preparation standards ensures data integrity, cross-study comparability, and publication-ready results.
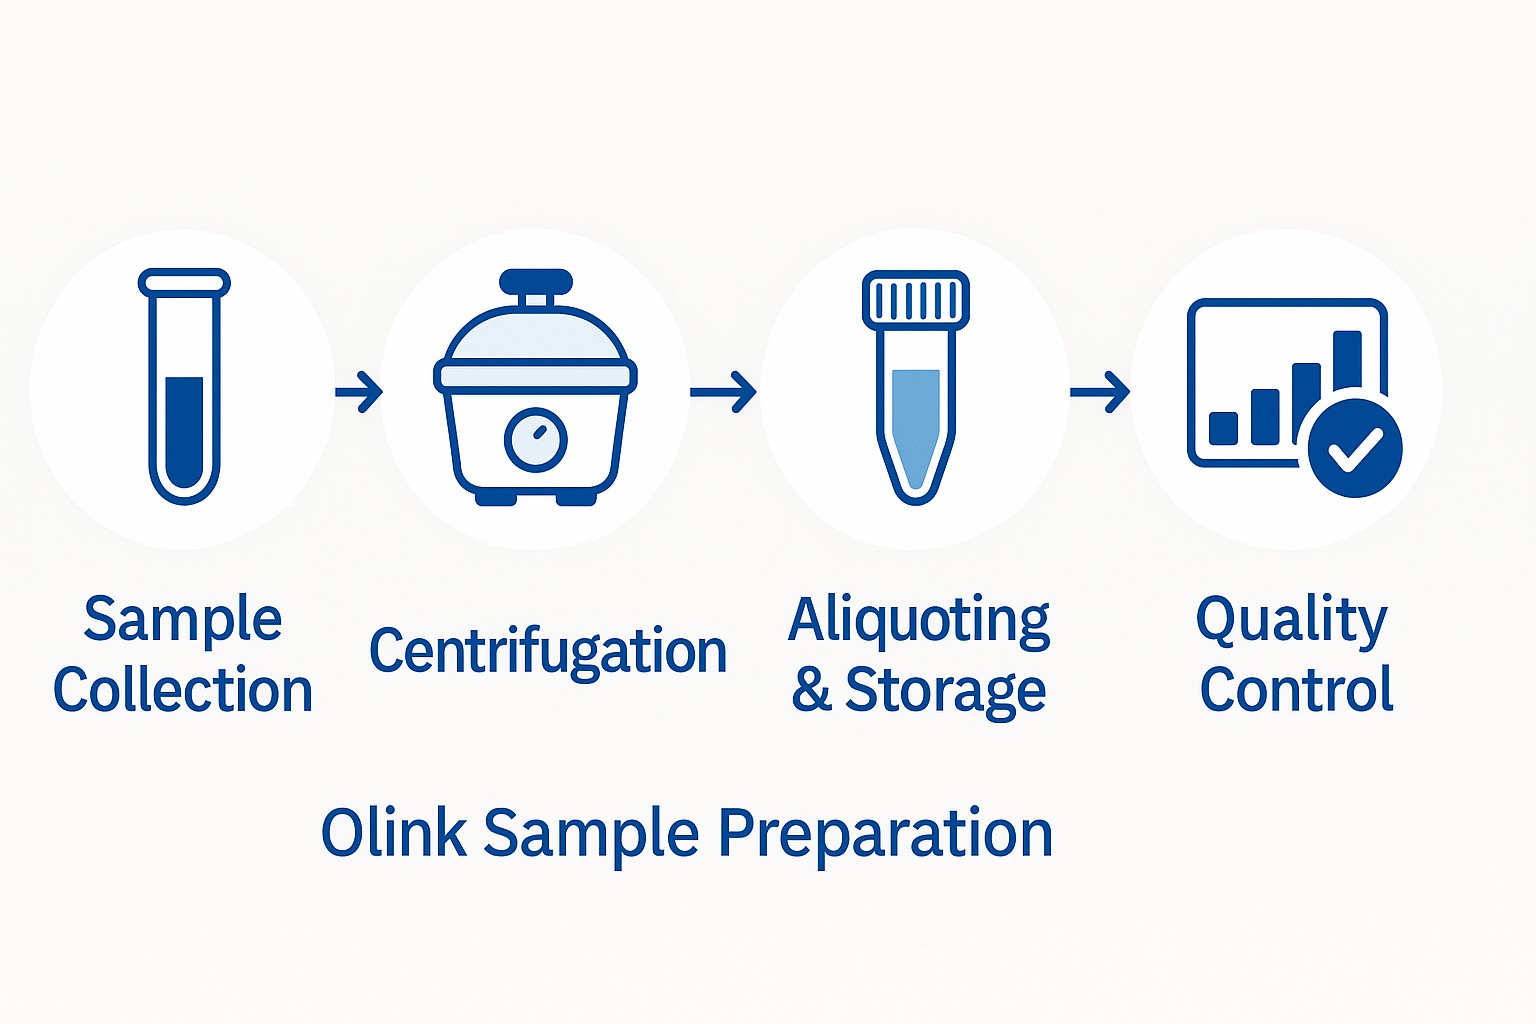
 Four key steps in Olink sample preparation
Serum and Plasma Sample Preparation for Olink Proteomics
Overview
Serum and plasma are the most widely validated sample types for Olink proteomics, offering broad applicability in clinical, translational, and biomarker discovery studies. All Olink panels have been rigorously tested on serum and plasma matrices, and these fluids remain the preferred choice for reproducible, cross-study protein quantification. Other biological samples—such as cerebrospinal fluid, tissue lysates, and cell supernatants—can also be analyzed successfully, but serum and plasma provide the highest assay robustness and standardization potential.
Pre-analytical Considerations
Standardized pre-analytical handling is critical to ensure reliable protein biomarker measurements. From study design and sample collection to downstream data analysis, cases and controls must be processed under identical conditions to avoid introducing bias.
Temperature is a key variable in proteomic sample preparation.
- Keep all specimens cold during processing and transport to minimize protein degradation.
- Samples should be shipped on dry ice and remain frozen upon arrival.
- For long-term storage, maintain samples at −80 °C or lower.
Serum Collection
- Collect whole blood in serum collection tubes (without anticoagulant).
- Allow the blood to clot at room temperature for 15–30 minutes. Avoid exceeding 60 minutes, as extended standing may cause cell lysis.
- Centrifuge at 1,000–2,000 × g for 10 minutes at 2–8 °C to remove clots.
- Transfer the clear serum into clean, low-binding tubes immediately.
- Store at −80 °C until analysis.
Plasma Collection
- Collect whole blood into tubes treated with EDTA, citrate, or heparin (EDTA preferred).
- Centrifuge at 1,000–2,000 × g for 10 minutes at 2–8 °C to separate plasma.
- Transfer the supernatant carefully into new, clean tubes without disturbing the buffy coat.
- Store at −80 °C until use.
Collection Tubes and Consistency
Use any commercially available tubes specifically designed for serum or plasma collection. It is essential to maintain consistency across all samples by using the same brand, size, and tube material throughout a study to minimize variability.
Sample Shipping and Storage
Container Type
Samples should be shipped in temperature-resistant, non-protein-binding plasticware, such as skirted 96-well PCR plates sealed with certified low-temperature adhesive films.
Recommended examples include:
- 96-well PCR plates with −80 °C-resistant sealing film (e.g., Sarstedt #72.1980.202 or equivalent).
- Eppendorf or cryotubes for smaller sample batches.
- If required, Olink Laboratories can transfer samples from 8-strip tubes or individual vials into 96-well plates upon receipt—please confirm in advance.
Sample Volume Requirements
- Minimum: ≥ 40 µL per sample.
- Recommended:
- 96-well plate: 50 µL/sample
- Eppendorf tube: 100–500 µL/sample
Only one tube of serum or plasma per participant is required for Olink analysis.
Labeling and Identification
Label plates or tubes with durable, low-temperature labels or indelible markers.
Use simple alphanumeric codes (e.g., A1, A2, B1) for easy traceability.
Transport Conditions
- Ship samples on dry ice (−78 °C) to maintain a frozen state during transit.
- Verify that samples remain frozen upon arrival.
- Avoid repeated thawing or temperature fluctuations.
Key Takeaway
Serum and plasma provide the most stable and reproducible matrices for Olink proteomics. Maintaining consistent handling—especially during collection, centrifugation, labeling, and frozen transport—ensures data accuracy and comparability across cohorts and time points.
Cerebrospinal Fluid (CSF) Sample Preparation for Olink Proteomics
Overview
Cerebrospinal fluid (CSF) is an ideal matrix for exploring neurological and neuroinflammatory biomarkers through Olink proteomics, as it reflects the biochemical environment of the central nervous system. However, because CSF has low protein content and is susceptible to contamination, rigorous handling and consistent collection protocols are essential for obtaining reproducible, high-quality data.
Collection and Pre-analytical Considerations
CSF is typically collected via lumbar puncture or spinal tap. Samples must be cell- and debris-free before storage at −80 °C. When possible, collect CSF together with matched plasma to facilitate cross-matrix comparisons of biomarkers.
Maintain consistency in the following factors across all samples:
- Needle type: Use non-traumatic (atraumatic) needles whenever possible.
- Collection site: lumbar puncture (L3–L5) is preferred; avoid mixing lumbar, cisternal, or ventricular samples within a study.
- Time of day: Collect samples at a consistent time, as circadian variations affect biomarker levels.
- Pre-storage temperature: store samples at room temperature or 4 °C until centrifugation; do not freeze unprocessed CSF.
- Tube type: use low-protein-binding polypropylene tubes (1–2 mL screw-cap) without additives. Avoid glass tubes.
- Aliquot volume: 0.2–2 mL per tube; use multiple small aliquots to reduce freeze–thaw cycles.
- Storage temperature: maintain long-term storage at −80 °C in a monitored freezer.
Collection Recommendations
- Preferred collection site: lumbar puncture at the L3–L5 interspace.
- Needle type: atraumatic spinal needle.
- Collection volume: a minimum of 12 mL per subject is recommended for reliable proteomic analysis.
- Use the first 2 mL for routine clinical chemistry.
- Pool and biobank the remaining volume for proteomic studies.
- Blood contamination: avoid samples containing more than 500 red blood cells per µL. Visibly blood-stained samples should be excluded or re-collected.
Centrifugation and Debris Removal
- If cells are to be retained for further analysis, centrifuge at 400 × g for 10 minutes at room temperature.
- For cell-free CSF intended for proteomic analysis: centrifuge at 2,000 × g for 10 minutes at room temperature to remove cells and debris.
- Process samples within 1–2 hours after collection to preserve biomarker integrity.
After centrifugation, transfer the supernatant to new low-binding polypropylene tubes, avoiding any disturbance of the pellet.
Aliquoting and Freeze–Thaw Management
Many CSF biomarkers, such as amyloid-β peptides, are sensitive to freeze–thaw cycles.
- Aliquot CSF into 0.1–1 mL volumes to minimize future handling and waste.
- Label each aliquot with sample ID, date, and matrix.
- Store at −80 °C and avoid repeated thawing.
Quality Control and Documentation
To ensure comparability across cohorts:
- Record all pre-analytical variables (collection time, needle type, centrifugation force, storage temperature).
- Use matched serum or plasma samples for cross-validation when available.
- Exclude samples showing visible hemolysis or clotting.
For standardized collection and biobanking guidance, refer to:
Teunissen C.E. et al., A consensus protocol for the standardization of cerebrospinal fluid collection and biobanking. Neurology 2009; 73:1914–1922.
Key Takeaway
High-quality CSF preparation depends on atraumatic lumbar collection, timely centrifugation, low-binding storage materials, and strict temperature control. Following these procedures ensures that Olink proteomics accurately captures disease-relevant protein signatures in neurological and neurodegenerative research.
Cell Culture Supernatant Preparation for Olink Proteomics
Overview
Cell culture supernatants—also known as conditioned media—contain secreted proteins that reflect a cell's physiological state. These samples are widely used in Olink proteomics to analyze cytokine release, growth factors, and intercellular communication. Proper handling and processing are critical to avoid degradation, matrix interference, or variability between replicates.
General Recommendations
Olink recommends using cell count or density rather than total protein concentration as a reference for sample normalization. This approach minimizes bias from serum additives and ensures consistency across experiments.
- Before collection, wash cells three times with PBS to remove serum proteins.
- Incubate in serum-free medium for 24 hours to allow the secretion of measurable biomarkers.
- Centrifuge to remove debris and collect the supernatant into low-binding tubes.
- Include a blank medium control in every run to detect background interference.
If strong induction of specific proteins is expected, test at least two dilution gradients to detect possible hook effects caused by over-saturation.
Medium Selection and Optimization
Different cell types require distinct culture media, such as DMEM or RPMI-1640 for general cell lines, and specialized formulations for organoids or stem cells.
For optimal protein recovery:
- Use medium without pH indicators (e.g., phenol red-free) to prevent interference with absorbance-based quantification.
- Minimize serum, albumin, and growth factor content before sampling, as these exogenous proteins can mask target biomarkers.
- Evaluate protein concentration using BCA or Qubit assays—both compatible with low-protein matrices and sensitive down to 5 ng/µL.
Improving Protein Yield
To maximize secreted protein concentration in supernatant samples:
- Reduce culture medium volume per well or flask to increase the local concentration of secreted proteins.
- Pool technical replicates from multiple wells or flasks to reduce variability.
- Concentrate samples using low molecular weight centrifugal filters (3K–10K Da cut-off) at 4 °C to avoid protein loss.
- Always add protease inhibitors before centrifugation and keep samples on ice during processing.
Serum Reduction and Cellular Leakage Control
To minimize residual serum interference:
- Starve cells for 1–2 hours before serum-free incubation to adapt metabolism.
- Rinse thoroughly with warm PBS or HBSS to remove serum proteins.
- For inflammation studies, use low-endotoxin serum and buffers to avoid false cytokine induction.
If there is concern about intracellular protein leakage due to apoptosis or necrosis, check the supernatant with a Western blot for the presence of nuclear or cytoplasmic proteins (e.g., β-actin, GAPDH). Such contamination indicates cell lysis rather than proper secretion.
Normalization of Cell Culture Supernatants
Normalization ensures comparability across samples. Choose one of the following strategies based on matrix composition:
- By protein concentration: Adjust all samples to 0.5–1 mg/mL if no serum or exogenous proteins are present.
- By cell count: Recommended when medium contains serum or growth factors; normalize based on initial seeding density.
- By total protein or DNA content: Applicable for complex models such as organoids or differentiated cultures.
- By intracellular loading controls: Use Western blot against housekeeping proteins (β-actin, β-tubulin, GAPDH, or DJ-1) to verify uniform cell input.
All samples should be aliquoted and stored at −80 °C to maintain stability before Olink analysis.
Key Takeaway
Following a controlled and reproducible supernatant preparation workflow, Olink assays can capture authentic secreted protein profiles, thereby improving biomarker detection sensitivity and ensuring meaningful biological interpretation.
Cell Lysate Preparation for Olink Proteomics
Overview
Cell lysates are among the most informative sample types for Olink proteomics, providing direct access to intracellular proteins, signaling molecules, and enzymatic regulators. Proper lysis and protein extraction ensure that each sample accurately represents the biological state of the cells.
This section outlines recommended lysis buffers, workflows, and quality control measures compatible with Olink's Proximity Extension Assay (PEA) platform, helping researchers achieve reliable, reproducible biomarker quantification.
General Recommendations
- The total protein concentration of each lysate should be 0.5–1 mg/mL, and all samples within the same batch should be normalized to identical concentrations.
- Always include a blank lysis buffer control to detect potential matrix interference.
- When comparing treatment conditions, test two dilution gradients per condition to identify potential hook effects caused by protein saturation.
Compatible Lysis Buffers
To ensure compatibility with the Olink PEA system, use mild non-ionic or low-ionic detergents and maintain physiological pH.
Recommended compositions:
- NP-40 buffer: 1% NP-40, 0.1% Triton X-100, 0.1% sulfobetaine, 150 mM NaCl, one mM EDTA, pH 8.0.
- RIPA buffer (gentle formulation): 50 mM Tris-HCl, pH 7.4, 150 mM NaCl, one mM EDTA, 1% Triton X-100, 0.1% sodium deoxycholate.
- Tissue-compatible lysis buffer: 50 mM Tris-HCl, pH 7.4, 100–150 mM NaCl, 0.5% non-ionic detergent.
Always supplement fresh protease inhibitors before use. Avoid high detergent or salt concentrations, extreme pH, or strong denaturants.
Keep all steps on ice to maintain protein stability.
Incompatible Buffer Conditions
Avoid lysis conditions that compromise assay performance:
- Detergents above 1% (NP-40, Triton, or Tween).
- Ionic detergents above 0.1% (SDS, deoxycholate).
- pH values outside 6.8–8.0.
- Salt >250 mM NaCl or >25 mM KCl.
- EDTA above 25 mM.
- Reducing agents (e.g., DTT) above one mM.
- Strong denaturants such as urea >2 M.
Protease Inhibitor Recommendations
Add inhibitors immediately before use to prevent protein degradation.
Common formulations include:
- PMSF at one mM.
- Cocktail mix: AEBSF (10.4 mM), Aprotinin (8 µM), Leupeptin (0.2 mM), Bestatin (0.4 mM), Pepstatin (0.15 mM), and E-64 (0.14 mM).
- Optional phosphatase inhibitors: NaF (5–10 mM) and Na₃VO₄ (1–2 mM).
Lysis Workflow for Adherent Cells
1. Prepare fresh lysis buffer containing protease inhibitors; keep on ice.
2. Wash cultured cells twice with warm PBS or HBSS to remove residual serum proteins.
3. Add sufficient lysis buffer to fully cover the monolayer (refer to Table 1).
4. Incubate on ice for 10 minutes or as recommended for your buffer.
5. Scrape cells gently and transfer the lysate into a clean microtube.
6. Vortex briefly, then centrifuge to remove debris.
7. Measure protein concentration and adjust to 0.5–1 mg/mL using the same inhibitor-containing buffer.
8. Aliquot and store at −80 °C.
Table 1. Typical lysis buffer volumes for different culture formats
| Culture Vessel | Recommended Lysis Buffer Volume (µL) |
| T25 flask | 500–1000 |
| 6-well plate | 200–400 |
| 12-well plate | 200–300 |
| 24-well plate | 100–200 |
| 96-well plate | 50–100 |
Lysis Workflow for Suspension Cells
1. Count cells to determine the required pellet size or total cell number.
2. Centrifuge at 500 × g for 5–10 minutes at 4 °C to collect cells.
3. Carefully discard the supernatant and gently blot residual liquid with tissue.
4. Add chilled lysis buffer containing inhibitors and incubate on ice for 10 minutes.
5. Mix gently by pipetting or vortexing to ensure complete lysis.
Table 2. Typical lysis volumes based on cell number
| Cell Count | Lysis Buffer Volume (µL) |
| 1 × 10⁶ | 100 |
| 2 × 10⁶ | 200 |
| 5 × 10⁶ | 500 |
| 1 × 10⁷ | 1000 |
Normalization and Storage
All cell lysates should be normalized to 0.5–1 mg/mL protein concentration.
Ensure consistent concentration across all samples within a project. Use compatible quantification assays (BCA, Bradford, or Nanodrop) verified against your buffer formulation.
After normalization:
- Aliquot into small volumes to avoid repeated freeze–thaw cycles.
- Store samples at −80 °C until analysis on the Olink platform.
Key Takeaway
Maintaining uniform cell lysis conditions and consistent protein concentration is critical for accurate Olink proteomics data. Adhering to validated, low-detergent buffer formulations prevents matrix interference and supports reliable biomarker detection across experiments.
Exosome Sample Preparation for Olink Proteomics
Overview
Exosomes—also referred to as extracellular vesicles (EVs)—are lipid bilayer particles that carry proteins, nucleic acids, and metabolites reflective of their cell of origin. These vesicles serve as critical biomarkers in disease research and the development of therapeutic interventions.
In Olink proteomics, exosome-derived protein analysis enables sensitive quantification of secreted factors and intercellular communication signals using the Proximity Extension Assay (PEA) platform.
General Recommendations
For Olink assays, exosome samples must be prepared in liquid form and adjusted to a total protein concentration of 0.5–1 mg/mL.
All samples within a batch should be standardized to identical concentrations to ensure comparability.
- Include a blank lysis buffer control to evaluate potential matrix interference.
- Test at least two dilution levels per condition to detect possible signal over-saturation.
- Always add protease inhibitors during processing to prevent protein degradation.
Exosome Isolation
Exosomes can be isolated from biological fluids or culture media using several validated approaches:
1. Differential centrifugation – sequential low- and high-speed spins for debris removal and vesicle enrichment.
2. Ultracentrifugation – the most common research-grade method; typically 100,000 × g for 60–120 minutes.
3. Size-exclusion chromatography (SEC) – suitable for plasma or serum samples; preserves vesicle integrity.
4. Polymer-based precipitation or magnetic bead kits – practical for small volumes or high sample throughput.
Regardless of the chosen method, maintain cold (4 °C) conditions throughout isolation to prevent vesicle rupture and proteolysis.
Lysis Buffer Recommendations
Use mild lysis buffers compatible with Olink's immunoassay chemistry.
Recommended formulations include:
- Non-ionic detergent buffer: 1 % NP-40, 0.1 % Triton X-100, 150 mM NaCl, one mM EDTA, pH 7.4–8.0.
- RIPA-style buffer (gentle): 50 mM Tris-HCl pH 7.4, 150 mM NaCl, 1 % Triton X-100, 0.1 % sodium deoxycholate.
- Tissue extraction buffer: 50 mM Tris-HCl, pH 7.4, 100–150 mM NaCl, 0.5 % non-ionic detergent.
Avoid high concentrations of ionic detergents or chaotropic agents, as they may interfere with antibody binding.
Incompatible buffer conditions:
- Detergent > 1 % (Triton, NP-40, or Tween)
- Ionic detergents > 0.1 % (SDS or deoxycholate)
- pH < 6.8 or > 8.0
- Salt > 250 mM NaCl or > 25 mM KCl
- EDTA > 25 mM
- DTT > 1 mM
- Urea > 2 M
Protease and Phosphatase Inhibition
To preserve protein integrity, supplement lysis buffers immediately before use with inhibitors such as:
- PMSF 1 mM
- Protease inhibitor cocktail: AEBSF 10.4 mM, Aprotinin 8 µM, Leupeptin 0.2 mM, Bestatin 0.4 mM, Pepstatin 0.15 mM, E-64 0.14 mM
- Phosphatase inhibitors: NaF 5–10 mM and Na₃VO₄ 1–2 mM
Keep all samples on ice during preparation.
Example Protocol for Exosome Lysis
1. Collect freshly isolated exosomes and keep them in cold PBS (4 °C). Avoid prior freezing to prevent vesicle rupture.
2. Add 25 µL of newly prepared lysis buffer containing inhibitors to each exosome sample.
3. Incubate on ice for 5 minutes, vortexing once or twice during incubation.
4. Verify that the lysate is clear and free of debris.
5. Measure protein concentration and adjust to 0.5–1 mg/mL using inhibitor-supplemented buffer.
6. If protein recovery is low, extend the incubation time up to 10 minutes or increase the buffer volume to 30 µL.
7. After quantification, aliquot lysates and store at −80 °C until Olink analysis.
Normalization of Exosome Samples
Interpreting exosome data requires consistent normalization across all conditions.
Common strategies include:
- By total protein content – the most direct approach (0.5–1 mg/mL).
- By vesicle number – normalize to total particle count measured by Nanosight or similar instruments.
- By cell number – applicable when exosomes are derived from cultured cells.
- By exosome markers – normalize against CD63, CD81, CD9, or other vesicle-specific proteins.
- By source-specific biomarkers – use known reference proteins for specialized vesicle populations.
Key Takeaway
Well-prepared exosome lysates provide robust and reproducible inputs for Olink proteomics, enabling the accurate profiling of extracellular communication and disease-associated protein signatures. Standardized lysis conditions, consistent normalization, and controlled processing are essential for cross-study comparability and confident biomarker discovery.
Amniotic Fluid Preparation for Olink Proteomics
Overview
Amniotic fluid (AF) contains both soluble proteins and suspended cellular debris, making it a valuable but technically challenging matrix for Olink proteomics. Improper processing can lead to clogging of assay chips or variability in protein measurements.
To ensure clean, reliable results, cellular material and residual particulates must be removed through sequential centrifugation steps before analysis.
Sample Handling Recommendations
Follow a two-stage centrifugation protocol under cold conditions (4 °C) to ensure complete removal of debris and prevent protein degradation.
Step 1 – Cell Removal (Low-Speed Centrifugation)
- Centrifuge amniotic fluid at 500 × g for 10 minutes at 4 °C using 15 mL conical tubes.
- This step removes intact cells and large aggregates.
- Carefully transfer the supernatant into a new sterile tube without disturbing the pellet.
Step 2 – Debris Removal (High-Speed Centrifugation)
- Centrifuge the cleared supernatant at 2,600 × g for 15 minutes at 4 °C.
- Discard any remaining particulate matter and transfer the clarified fluid to a clean microtube (1.5 mL or 2 mL).
Protein Quantification and Stabilization
After centrifugation, measure total protein concentration and adjust all samples to 0.5–1 mg/mL using a buffer compatible with the Proximity Extension Assay (PEA).
Before storage:
- Add 10 µL of freshly prepared 100× protease inhibitor cocktail to every 990 µL of amniotic fluid to preserve protein integrity.
- Mix gently without vortexing to avoid foaming or shear stress.
Aliquoting and Storage
- Divide samples into single-use aliquots to minimize freeze–thaw cycles.
- Store aliquots at −80 °C until Olink analysis.
- Label each tube with sample ID, collection date, and matrix type.
Quality Control and Normalization
- Ensure all samples within a project are processed under identical centrifugation conditions.
- Normalize total protein concentrations prior to analysis to ensure data comparability.
- For low-abundance samples, consider duplicate measurements or technical replicates to confirm reproducibility.
Key Takeaway
Proper pre-centrifugation, debris removal, and protease inhibition are crucial for maintaining the integrity of amniotic fluid samples in Olink proteomics biomarker studies.
Following this workflow reduces assay variability and supports reproducible quantification of pregnancy-related and developmental biomarkers.
Sputum Sample Preparation for Olink Proteomics
Overview
Sputum is a complex biological fluid composed of mucus, cells, and secreted proteins that reflect airway inflammation and immune responses. In Olink proteomics, sputum analysis enables quantitative profiling of cytokines and inflammatory mediators relevant to respiratory diseases such as asthma and COPD. Proper sample processing is crucial for removing mucus viscosity, reducing variability, and ensuring compatibility with the Proximity Extension Assay (PEA) platform.
Recommended Protocol
The following workflow has been validated for Olink proteomics and does not require the addition of reducing agents such as DTT, which may interfere with antibody binding.
Step 1 – Sample Selection and Dilution
- Select a representative sputum plug and record its weight accurately.
- Add eight times the sample weight of cold phosphate-buffered saline (PBS) to the sputum.
- Mix thoroughly and incubate at room temperature for 15 minutes, using vortex agitation to disperse mucus components.
Step 2 – Clarification by Centrifugation
- Transfer four times the sample volume to a clean centrifuge tube.
- Centrifuge at 13,000 rpm for 5 minutes to separate soluble proteins from cellular debris.
- Carefully collect the clear supernatant without disturbing the pellet.
Protein Recovery and Storage
- Aliquot the supernatant into cryotubes immediately after centrifugation.
- Store aliquots at −80 °C until Olink proteomics analysis is performed.
- Avoid multiple freeze–thaw cycles to preserve protein stability.
Protein Quantification and Compatibility
Determine the total protein concentration using a method compatible with low-viscosity matrices, such as the BCA or Qubit assays.
Adjust samples to a final protein concentration of 0.5–1 mg/mL before analysis.
Ensure all samples within a study are processed under the same conditions to minimize technical variation.
Quality Control Tips
- Include one blank PBS control per batch to identify background signals.
- For viscous or highly cellular samples, consider extending the vortexing step or increasing the PBS dilution to improve sample homogeneity.
- Avoid using mucolytic agents that could alter protein epitopes or assay sensitivity.
Key Takeaway
Sputum sample preparation for Olink proteomics relies on careful dilution, controlled centrifugation, and consistent protein normalization. Following this protocol ensures reproducible detection of airway inflammation biomarkers and supports accurate respiratory disease profiling.
Breast Milk Preparation for Olink Proteomics
Overview
Human breast milk is a nutrient-rich biological fluid that contains a diverse array of proteins, lipids, and immune factors. However, its high viscosity and variable composition pose challenges for Olink proteomics analysis. The presence of fat globules and cellular debris can interfere with antibody-based detection, potentially impacting data quality. To ensure reproducible results, samples should be processed to isolate the whey fraction, which is compatible with the Proximity Extension Assay (PEA) platform.
Sample Processing Strategy
The objective of breast milk preparation is to remove fat and cells without introducing harsh chemical treatments or filtration materials that could bind target proteins.
Step 1 – Removal of Fat and Cells
- Collect freshly expressed breast milk and keep it on ice.
- Centrifuge at 680 × g for 10 minutes at 4 °C to separate the fat layer and cellular components.
- Carefully remove and discard the upper layer of fat.
- Collect the supernatant and repeat the centrifugation once more under the same conditions to ensure complete removal of fat.
Step 2 – Whey Collection
- After the second spin, collect the transparent, semi-transparent layer beneath any residual fat—this is the whey fraction.
- Transfer the whey into a clean, low-binding tube.
- Avoid filtration unless necessary; filters may adsorb low-abundance proteins, which can distort quantitative results.
Protein Measurement and Preparation for Analysis
- Measure total protein concentration using BCA or Qubit assays, which are suitable for low-concentration samples.
- Adjust the final concentration to 0.5–1 mg/mL using an Olink-compatible buffer.
- Add protease inhibitors immediately before aliquoting to prevent degradation.
Storage and Handling
- Aliquot whey samples into small, single-use cryotubes to prevent repeated freeze–thaw cycles.
- Store samples at −80 °C until Olink analysis is performed.
- Label each tube clearly with sample ID, matrix type, and collection date.
Quality Control and Consistency
- Process all milk samples under identical centrifugation and handling conditions to minimize inter-sample variability.
- If a sample repeatedly fails Olink quality control, it may contain natural inhibitors; replacing the sample or reprocessing a new aliquot is recommended.
- For longitudinal studies, collect samples at consistent times postpartum to reduce biological variation.
Key Takeaway
Careful removal of lipids and cells followed by collection of the whey fraction ensures that breast milk samples are compatible with Olink proteomics assays. This standardized workflow facilitates the accurate detection of cytokines and immune modulators in maternal and neonatal research, thereby enhancing reproducibility and improving outcomes for biomarker discovery.
Ophthalmic Sample Preparation (Eye Fluid and Tear Collection)
Overview
Ophthalmic fluids—aqueous humor, vitreous humor, and tears—enable minimally invasive profiling of local inflammation and therapeutic response. For Olink proteomics, careful clarification, consistent handling, and avoidance of assay inhibitors are essential for robust PEA-based quantification.
Aqueous Humor (AH) and Vitreous Humor (VH)
Collection and Initial Handling
- Collect AH or VH under sterile conditions and keep on ice.
- For VH, note its higher viscosity; use wide-bore tips and gentle pipetting.
- Avoid hemolysis or blood contamination to prevent false inflammatory signals.
Clarification
- For AH (low viscosity): centrifuge at 1,000–2,000 × g for 10 minutes at 4 °C, transfer the supernatant to a clean tube.
- For VH (high viscosity): either
- a high-speed centrifuge at ≥12,000 × g for 15 minutes at 4 °C, or
- pass through a 0.22 µm low-protein-binding membrane to remove gels and particulates.
- Re-clarify if visible particulates remain before storage.
Protein Measurement and Normalization
- Quantify total protein using BCA or Qubit assays.
- Adjust to 0.5–1 mg/mL in an Olink-compatible buffer.
- Add protease inhibitors immediately before aliquoting.
Storage
- Aliquot to minimize freeze–thaw; store at −80 °C.
- Label with sample ID, matrix, and collection date for traceability.
Note: If fluorescein dye was used clinically, avoid tear or AH collection within 24 hours for Target 96 workflows, as residual dye may interfere with qPCR-based detection.
Tear Collection
Collection Methods
- Schirmer strip or microcapillary collection is both acceptable.
- For broader accessibility, Schirmer strips are practical; microcapillaries reduce off-target proteins but require trained personnel.
Elution from Schirmer Strips
1. Using sterile forceps, roll the strip into a low-protein-binding insert or clean microtube.
2. Add ~300 µL of pre-chilled elution buffer (e.g., saline or PBS with trace non-ionic detergent and carrier protein). Ensure the strip is fully submerged.
3. Incubate 10 minutes at room temperature; optionally, place on a tube rocker.
4. Centrifuge at 16,000 × g for 10 minutes; collect the eluate into a clean tube.
5. If needed, repeat with a reduced elution volume to increase the final concentration.
Protein Measurement and Preparation
- Measure total protein (BCA or Qubit).
- Normalize to 0.5–1 mg/mL using Olink-compatible buffer.
- Add protease inhibitors immediately before aliquoting.
Storage
- Aliquot eluates; store at −80 °C.
- Avoid filtration unless necessary, as some membranes can adsorb low-abundance proteins.
Quality Control and Consistency
- Process all ophthalmic samples under identical centrifugation and buffer conditions.
- Include a blank buffer control to monitor the background.
- For low-volume tears or AH, consider technical replicates to confirm reproducibility.
Key Takeaway
Standardized clarification, gentle handling, and inhibitor-aware workflows make ophthalmic fluids compatible with Olink proteomics, enabling sensitive, reproducible measurement of eye-specific cytokines and biomarkers for translational research.
Olink Proteomics Sample Preparation – General Quality Control and Data Reliability
Overview
Consistent and well-documented sample handling is fundamental for reliable Olink proteomics data. Differences in centrifugation speed, buffer composition, or freeze–thaw cycles can introduce variability that masks actual biological differences. Establishing precise quality control (QC) procedures ensures that results are reproducible, comparable across studies, and compliant with the principles of good laboratory practice (GLP).
Sample Consistency and Metadata Documentation
To achieve robust data integrity:
- Process all samples from a project under identical experimental conditions.
- Record sample type, collection method, storage duration, and freeze–thaw history.
- Maintain consistent centrifugation forces, incubation times, and buffer formulations to ensure reproducibility.
- Implement batch identifiers and barcoded sample labels for full traceability.
Protein Quantification and Normalization
Protein concentration normalization is key to comparability between samples and assay plates.
- Use validated quantification assays, such as BCA or Qubit, which are calibrated for the specific sample matrix.
- Adjust total protein to 0.5–1 mg/mL before loading onto the Olink platform.
- For samples with inherently low protein levels (e.g., tears, cerebrospinal fluid), document concentrations and replicate measurements where possible.
Controls and Technical Replicates
- Include blank buffer controls and, where relevant, matrix-matched blanks to identify background signals.
- Run technical duplicates of select samples to assess intra-assay precision.
- Incorporate reference standards or pooled QC samples between plates to monitor inter-plate variation.
- Exclude samples that fail visual inspection or contain visible debris or color contamination.
Storage and Transport Integrity
- Always store samples at −80 °C in low-binding plastic tubes or skirted plates with cold-resistant seals.
- Limit samples to one freeze–thaw cycle before analysis.
- Ship frozen samples on dry ice; avoid temperature fluctuations during transport.
- Verify the sample temperature upon arrival and document any deviations from the expected value.
Data Review and Reproducibility
Once the Olink data are generated, review QC metrics such as:
- Internal control signals (incubation, extension, and detection controls).
- Normalized Protein eXpression (NPX) distributions across plates.
- Outlier detection via PCA or clustering.
- Document corrective actions and maintain raw data for reproducibility and auditing.
 Olink Proteomics QC Workflow.
Key Takeaway
Strict adherence to standardized sample preparation and QC protocols ensures data comparability across cohorts and time points. By controlling technical variables and maintaining transparent documentation, researchers can maximize the reproducibility and interpretability of Olink proteomics datasets.
Summary and Conclusion
Overview
Reliable protein biomarker discovery begins with precise, standardized sample preparation. Across all biological matrices—cell lysates, exosomes, culture supernatants, and clinical fluids such as amniotic fluid, sputum, breast milk, and ophthalmic samples—consistent pre-analytical workflows are essential to ensure data reproducibility and biological relevance in Olink proteomics studies.
Integrating Best Practices Across Sample Types
Each sample type presents unique challenges:
- Cell-based samples require controlled lysis and consistent protein normalization to ensure accurate results.
- Exosomes demand gentle handling to preserve vesicle integrity and avoid protein loss.
- Clinical fluids such as sputum and amniotic fluid require clarification to remove debris and inhibitors.
- Complex matrices, such as breast milk or vitreous humor, must undergo fat or gel removal before analysis.
Despite these differences, the fundamental principles remain constant—remove contaminants, prevent degradation, and maintain concentration consistency. When applied systematically, these practices support high-throughput, quantitative profiling of cytokines, growth factors, and disease-related proteins.
Scientific and Translational Impact
Adhering to validated sample preparation and quality control procedures allows researchers to:
- Generate reproducible data suitable for multi-center studies and biomarker validation.
- Enhance correlation between proteomic signatures and clinical outcomes.
- Enable integrative multi-omics analyses linking proteomics with transcriptomics or metabolomics.
- Build robust biomarker panels that accelerate translational research and therapeutic development.
Commitment to Research Excellence
Creative Proteomics is dedicated to empowering researchers with reliable, standardized, and publication-ready Olink proteomics solutions. By following these preparation and QC guidelines, clients can achieve consistent data quality, reduce technical bias, and gain stronger biological insights—transforming every experiment into a meaningful discovery.
FAQs
Q1: What sample types are validated for the Olink PEA-based proteomics workflow?
A1: The workflow is validated for serum and plasma as primary matrices, while additional types such as cerebrospinal fluid (CSF), tissue lysates, conditioned media, and extracellular vesicles have also been used successfully.
Q2: How important is it to keep samples cold during collection, processing, and shipping?
A2: Very important. Maintaining low temperatures (e.g., on ice during processing, and dry ice during shipping) minimizes protein degradation and preserves data integrity.
Q3: Can I mix different tube types or brands for serum/plasma collection within the same study?
A3: No. Consistency in collection tube brand, type, and size is key to reducing variability and ensuring comparable proteomic results.
Q4: How should cerebrospinal fluid (CSF) be handled to prevent contamination and ensure quality for Olink analysis?
A4: CSF should be collected via lumbar puncture, cell- and debris-free (via centrifugation), aliquoted to minimize freeze-thaw effects, and stored at −80 °C. Matching plasma may be collected simultaneously for comparative biomarker analysis.
Q5: What are common pitfalls that lead to QC warnings or unreliable Olink assay runs?
A5: Major pitfalls include sample temperature fluctuations, visible debris or hemolysis, inconsistent pre-analytical processing, freeze-thaw cycles, and operator error. A high fraction of QC-warnings suggests the run may need to be repeated.
References
- Teunissen, C. E., et al. (2009). A consensus protocol for the standardization of cerebrospinal fluid collection and biobanking. Neurology, 73(22), 1914–1922.
- Lee, J. W., et al. (2019). Fit-for-purpose method development and validation for successful biomarker measurement. Pharmaceutical Research, 36(9), 131.
- Assarsson, E., et al. (2014). Homogenous 96-plex PEA immunoassay exhibiting high sensitivity, specificity, and excellent scalability. PLoS ONE, 9(4): e95192.
- Doherty, M. K., & Whitfield, P. D. (2011). Proteomics moves from expression to turnover: update and future perspective. Expert Review of Proteomics, 8(6), 709–723.
- Tkach, M., & Théry, C. (2016). Communication by extracellular vesicles: where we are and where we need to go. Cell, 164(6), 1226–1232.


